How to Use Servo Motors with the Arduino UNO
2019-04-25 | By Maker.io Staff
In this How-To article, we will learn what servo motors are, where you may use them, and how to use them!
BOM
- 1 x Servo Motor - 900-00005-ND
- 1 x Arduino Uno - 1050-1024-ND
- 1 x Breadboard - 1738-1326-ND
Scheme-It

Servo Motors – How do they work?
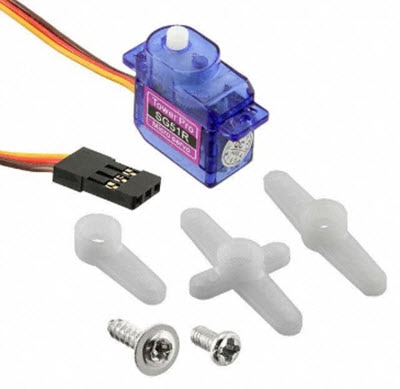
Servo motors come in many different sizes, shapes, and styles, but the ones found in maker environments are almost always similar to the one shown below.

These types of motors provide accurate positioning, and while some can rotate a full 360 degrees (900-00008-ND), most have a 180-degree rotation capability (900-00005-ND). Even though these motors can provide accurate position (via a digital input signal or PWM), they use DC brushed motors, which do not have step capabilities. So how can a servo know when it is pointed in the right direction? The answer is closed-loop feedback!
While the motor that drives servos is a DC brushed motor, the motor is connected to a series of gears that step down the rotation (to increase torque), and the “output gear” is also connected to a small potentiometer. As the servo rotates to the desired position, the value of the potentiometer changes, and this value is fed into a small onboard circuit that compares the requested angle with the potentiometer value. From there, the motor can be made to turn either clockwise or counterclockwise to match the rotation of the output shaft with the desired angle.
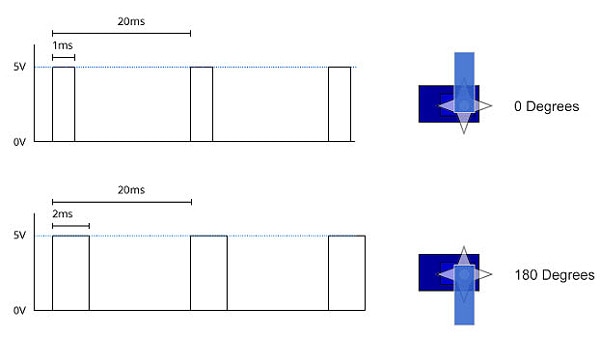
Servo motors are controlled with a 3-pin input, with two pins being used for power (+ and -) and the third signal used for setting the angle. This signal is a PWM (Pulse Width Modulation) waveform whose frequency should be approximately 20ms and the duty cycle between 5% and 10% (which represent 0-degrees and 180-degrees, respectively).

Using a servo on the Arduino
While servo control can be coded from scratch, it doesn’t really make much sense when there is a library on the Arduino called “Servo” that can handle all the waveforms for us! All we have to do is declare the library, create a servo object, and write the value that we want to set the servo to. The Servo library comes with the Arduino IDE by default and is very straightforward to use.
Step 1 – Include the library
This is the line that you include at the top of your Arduino program.
#include <Servo.h>
Step 2 – Create a servo object
We need to create a servo object, which is used to interact with our servo in the real world. The name of your object needs to be unique. Try to give it a name that makes sense from a programming point of view (for example, arm_motor instead of m132).
Servo myservo;
Step 3 – Attach the servo to an output
Our servo’s digital signal needs to be connected to an output on the Arduino. While most (if not all) IO can be used with servos, it’s best to choose a digital pin other than pins 0 or 1 (which are UART pins needed for programming). In this example, we will use pin 9.
void setup() {
  myservo.attach(9);
}
Step 4 – Set it to the angle!
At this point, we can now control our servo by telling it to point to a specific angle (as an integer). This is done with the .write(int position) function. The example below shows how to set the servo into three different positions.
myservo.write(0);			// Rotate to 0 degrees
delay(1500);
myservo.write(90);			// Rotate to 90 degrees
delay(1500);
myservo.write(180);			// Rotate to 180 degrees
delay(1500);
For more details on servo motors check out these articles;
Servo Motors and Control with Arduino Platforms


