制造商零件编号 SC0022
SBC 1.2GHZ 4 CORE 1GB RAM
Raspberry Pi
November the 11th was the release day of the Nintendo Classic Mini, which is a replica of the original NES with up to 30 classic games all for $49. However, due to high demand and limited production they have become somewhat difficult to get a hold of. But do not panic, we have you covered with creating your very own retro games console using a Raspberry Pi and RetroPie OS courtesy of PetRockBlock.
RetroPie allows you to turn your Raspberry Pi or PC into a retro-gaming machine. It builds upon Raspbian, EmulationStation, RetroArch and many other projects to enable you to play your favourite Arcade, home-console, and classic PC games with minimum set-up. For power users it also provides a large variety of configuration tools to customise the system as you want.
Things you will need
You will need the following items before getting started:
Getting Started
First thing you will need to do is head over to the RetroPie website download page where you can download the latest image (v4.1 as of 5th November) for your Raspberry Pi computer. By far the easiest option is to download the full SD image of the OS rather than installing on top of your existing OS. Select the option which represents your setup as shown in Figure 1.
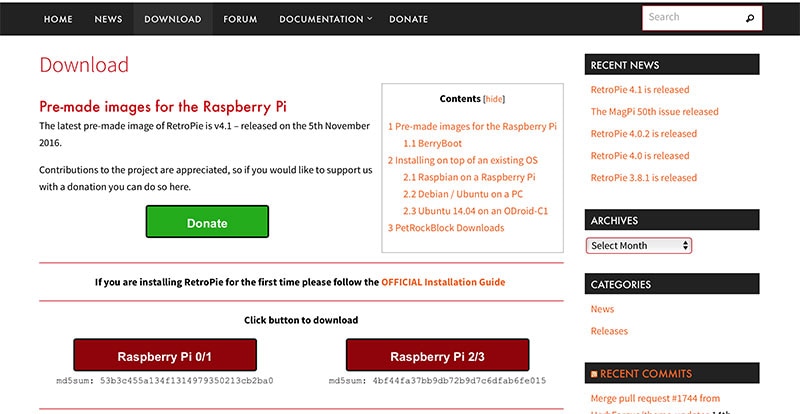
Figure 1: Select your Raspberry Pi Version
Once downloaded you will need to burn the image to your MicroSD card. On Windows you can use WinDisk32Imager software and on MAC OS you can use Etcher. Either of these will write the RetroPie image to the MicroSD card. Insert the MicroSD card into your computer and select the drive letter in your software.
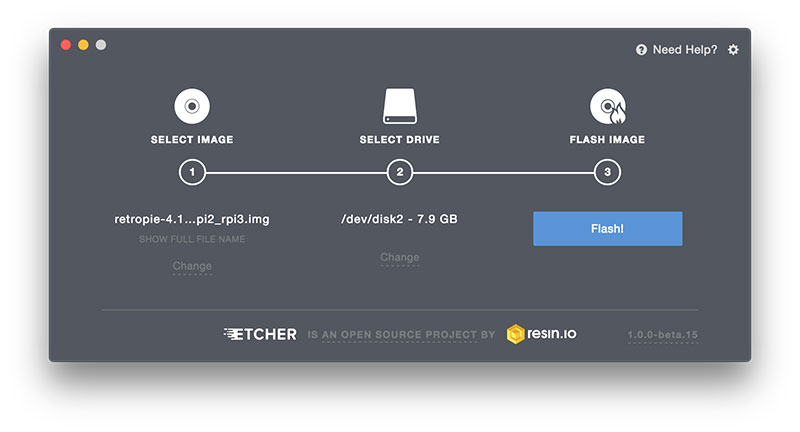
Figure 2: Flashing RetroPie to a microSD Card
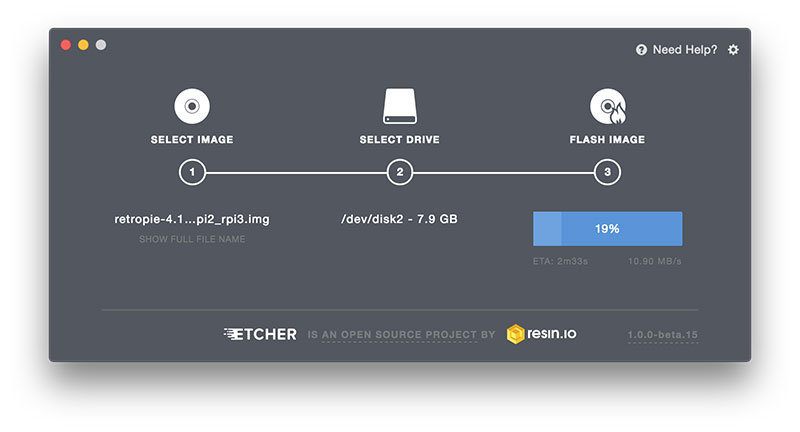
Figure 3: Process should take about 5 mins until completion
Next you will need to hook up the Raspberry Pi to an HDMI display, insert the MicroSD card into the Raspberry Pi SD slot and also before you power up the device connect your USB controller to the Raspberry Pi’s USB port. For this example, I used the USB controller as shown in the below figure.
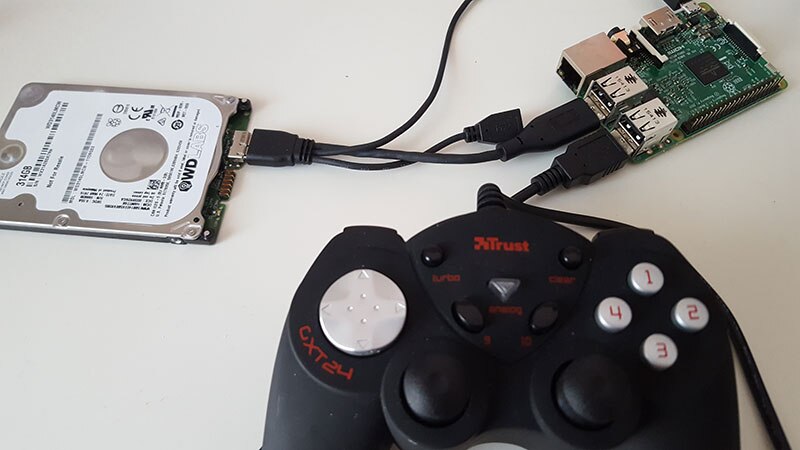
Figure 4: Connect your USB controller to the Raspberry Pi
Connect the power to the Pi and boot it up. On first screen you will be required to setup your controller for the Emulation station menu and game buttons, just follow the on-screen button presses and select OK to save.

Figure 5: Setting up the Controller
Loading ROMs
There are a couple of different ways in which you can load your ROM files to the RetroPie to be able to play your games. By default, the EmulationStation menu will not show any emulators in the menu unless you load some ROMs for that particular platform.
The first way I’m going to show you is using a USB thumb drive. First you will need to insert your drive into your computer and create a new folder labelled “retropie”.

Figure 6: Create a New Folder Called retropie
Plug it into your Raspberry Pi and wait for it to finish blinking the LED. Pull the USB out and plug it back into your computer. Open the USB drive up and you should see all the folders for the emulators where you can add your ROM files.

Figure 7: ROM Folder Created
Copy your ROMs to the folder in which they sit in and then plug the USB drive back into the Raspberry Pi. Wait for the USB drive to stop blinking and then restart the EmulationStation from the main menu and it will find all of your ROM files. You should now be able to navigate the menu left and right and play your games.
The second way to load your ROM files is using something called Samba, which is a network protocol for sharing files. By default, Samba is enabled on the RetroPie OS, all you have to do is connect to your network using either Wi-Fi or Ethernet cable.
To configure Wi-Fi using RetroPie all you need to do is open up the main menu and select “WIFI” at the bottom. You will be presented with a menu which gives you options to either connect to a WiFi network, disconnect/remove WiFi setting or import credentials from a config file. You will need to select the first option, which will scan for local wireless devices and prompt you to enter your WiFi credentials. Once connected you can restart RetroPie for the changes to take effect.
If you are using a Windows computer, you can open up your computer folder and enter the following address in the URL bar:
\\RETROPIE
If using MAC OS then you just need to open up finder and you should see RETROPIE network device on the left hand side. If it doesn’t show up then you can also add it manually by navigating to “GO” and select “Connect to Server” in the finder menu and adding the following URL:
smb://retropie
Then hit “Connect” to establish a network connection.

Figure 8: Network Connection to RetroPie
Setting Up a PS3 Controller
The most recent versions of RetroPie include the packages needed for setting up a PS3 controller. Connecting over USB is Plug and Play, you just plug your controller into the Pi while EmulationStation is running and it should detect a gamepad to configure. Connecting a PS3 controller via Bluetooth requires installation of a special PS3 driver located in RetroPie setup.
Before booting the Raspberry Pi, make sure that a supported Bluetooth adapter is connected. After your Pi boots up, you need to enter RetroPie setup. You can do this one of two ways:
Once in the RetroPie GUI, navigate to the RetroPie Setup Option. A terminal-like window will pop up with a list of choices; navigate to the "Drivers" option and select it. Select PS3 Controller Driver, and then select Install. Once installation completes, exit RetroPie setup and return to the EmulationStation Home Screen. Press "Start" to enter the EmulationStation Menu, and select Configure Input. Disconnect your PS3 controller from USB. Now hold the PS button on the controller down until you see the lights on it flash sequentially. The controller should now be connected via Bluetooth. Emulation Station should now detect another gamepad connected. Hold any button down on the controller to begin configuring it.
BerryBoot and PiDrive
If you’re an avid retro gamer then you would have collected thousands of ROMs like myself, however as we know they will not all fit on a single 8GB or even a 32GB SD card. Thanks to BerryBoot there is an option to install RetroPie on a USB hard drive that utilises its maximum space. Just recently this year Western Digital released a USB drive specifically for the Raspberry Pi called “PiDrive” which works great with the RetroPie build.
You will need the following:
First you will need to download the BerryBoot bootloader files from their website, making sure you select the correct bootloader for your Raspberry Pi version. Next you will need to format your SD card so it is blank. You can download an SD formatting tool for both Mac OS and Windows from the SD Association website.
Once formatted copy and paste the berry bootloader files to your SD card.
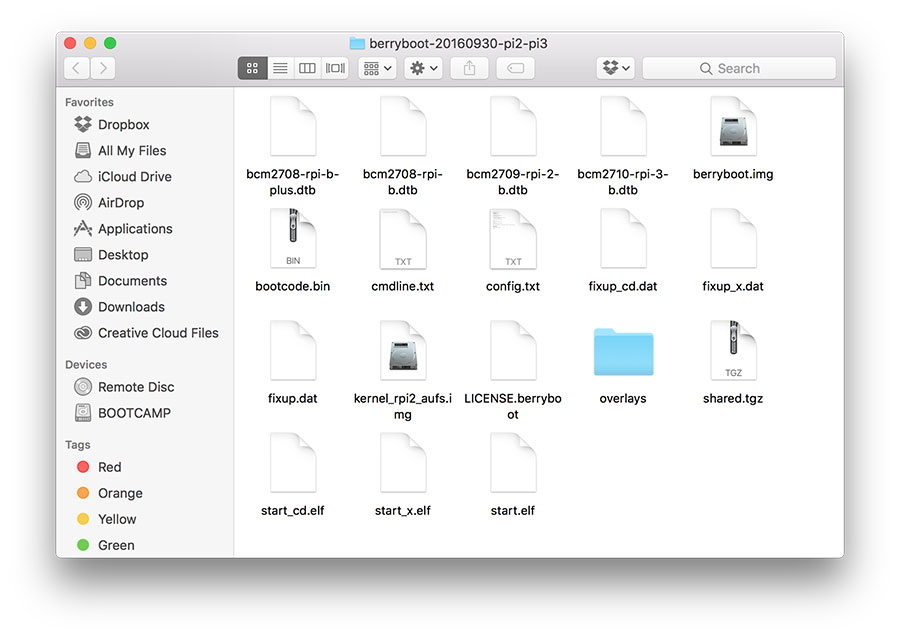
Figure 9: Copy all bootloader files to your SD card
Next you will need to download the RetroPie image for BerryBoot from the RetroPie GitHub page. Normally I would recommend you use the latest version but I had issues with version 4.1 so I used the 4.02 version, which worked fine.

Figure 10: Download the RetroPie BerryBoot OS
Once downloaded, copy and paste the file to a USB flash drive, which we will use to install on your USB hard drive. Now insert your SD card into the Raspberry Pi and also plug in your USB hard drive that you will use to store and run your RetroPie OS image, you will also need a mouse and keyboard at this point too. Insert your power cable and boot up the Raspberry Pi. You will see a configuration screen where you need to configure your local settings such as language, time, audio and network settings.
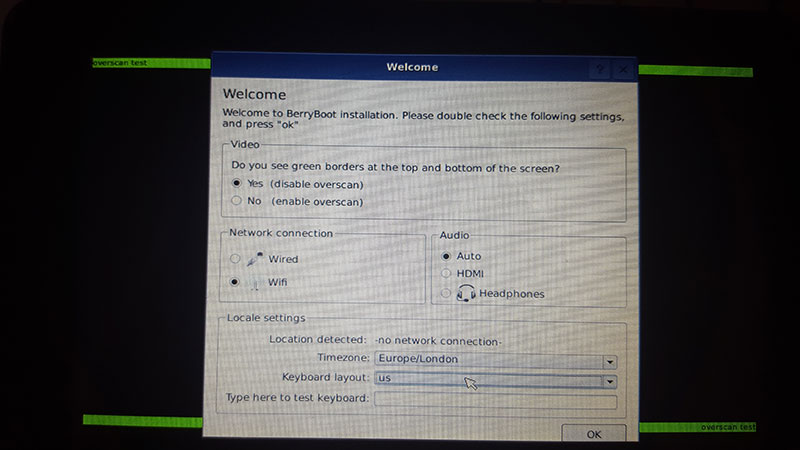
Figure 11: BerryBoot Configuration
In the next screen it will prompt you to select your USB hard drive to install the OS, select the drive and hit “Format” which will take a few mins. On the next menu BerryBoot will ask you to select an OS to install on the drive. As we have our OS image on the USB flash drive we want to install it from there. Click “Cancel” to go back to the main menu and hold down the mouse button on “ADD OS” and you should see s sub menu which says “Install from USB”.
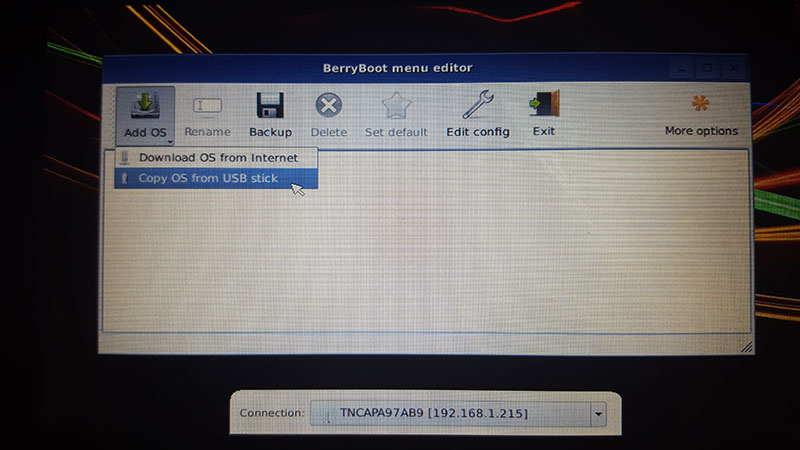
Figure 12: Install OS from USB
Insert your USB flash drive and then select the RetroPie image to be copied to the USB hard drive. Once completed you can now click “Exit” and the Raspberry Pi will reboot with RetroPie.
Have fun!