Hands on with the Texas Instruments' MSP430 LaunchPad and SeeedStudio’s SideKick Kit
2016-08-11 | By Maker.io Staff
At the heart of the Texas Instruments’ LaunchPad range of development boards is the MSP430. The MSP430 is an easy-to-use flash programming microcontroller, just like other microcontrollers such as the ATmega range from Atmel. The MSP430 MCU was specifically designed to be low-cost and low-powered, suitable for a range of applications.
The MSP430 can be used for low-powered embedded devices when the current consumption in the board's idle state is less than 1µA. The MCU reaches speeds of up to 25MHz when required, but it can also be scaled back down to reduce the current consumption even further. The MCU actually has up to six power saving modes which can be activated by disabling certain features of the board that are not required.
MSP430 Hardware Features
The MSP430 LaunchPad comes in a variety of configurations such as more flash-memory and double the GPIO pins with the QNF package. The configuration I will be looking at in this review is the MSP-EXP430G2, which is the original variation of the LaunchPad range of development boards. The MSP430 MCU features the following:
- Internal Oscillator
- Time including PWM
- USART
- SPI
- I2C
- 10/12/14/16/24-bit ADC
- Brown-out reset circuitry
- JTAG in-system programming
- UART
- USB Support
Every MCU is not without its limitations. The MSP430 does not feature an external memory bus, hence it is limited to the on-chip memory up to 512KB flash depending on board variation. Some applications may require more than this.
There are currently six generations of MSP430 development boards, MSP430G2 is the second generation and was introduced in the late 1990’s. This particular board superseded the first generation and introduced even further power-saving features with support up to 16MHz. It also features flash-based ultra-low power MCU up to 16 MIPS.
MSP430 Peripherals
As in most MCU’s some pins are connected to more specialized features, but if that feature is not in use it can be used as a general purpose pin. On the MSP430 these GPIO pins are divided into ports, which you can see labelled on the board itself.

The MSP430 features the following internal peripherals for user:
- 10/12-bit ADC
- 8/12-bit DAC module
- 2x 8-bit timers that be both cascaded to form a 16-bit timer/counter
- WDT+ (Watchdog) performs a controlled system restart after a software issue occurs
- Brown-out reset detects low voltage supply and resets the device by triggering a power-on reset
- Direct memory access controller transfers data form one address to another without the need for the CPU, reducing overall power consumption
- Capacitive touch sense I/O’s module offers benefits of touch and slider applications. It does not require any external circuitry for operation
- GPIO’s, MSP430 devices have 12 digital I/O ports mapped as either an input or output. Ports P1 and P2 also have interrupt ability
- USART provides communication for UART, SPI and I2c both transmit and receive
- USB – The USB module is fully compliant with 2.0 specification and data rates up to 12 Mbps. The USB port can also provide suspend, resume and wake-up configurations
Software Development Environment
Texas instruments have introduced a number of IDE’s for programming the MSP430 LaunchPad and respective family of boards.
Energia IDE
Introducing the Energia IDE programming environment, which if you are an avid Arduino user then you will be familiar with this IDE. Energia is an open-source prototyping platform forked from the Arduino IDE to the TI MPS430. The main difference is that Energia uses the mspgcc compiler but is still based on the Wiring and Arduino framework.

Energia works on Mac OS, Windows and Linux operating systems making it perfect for beginners. The IDE also includes a number of example sketches to get started.
CCS Cloud
CCS Cloud is a cloud-based IDE that enables code editing, compilation and flashing your TI LaunchPad all in your web browser, eradicating any requirements for installing drivers and software on your computer. The CCS Cloud IDE is based on the Cloud9 IDE, which is also commonly found on the BeagleBone Boards. The Cloud IDE is much more versatile compared to the Energia IDE, it allows you to debug in the cloud, whilst also managing your project much more easily using multi-tab viewing and revision control.

If you are an active GitHub user then you can also manage your projects by cloning your repo’s in the Cloud IDE, making it easy to leverage community-developed projects.
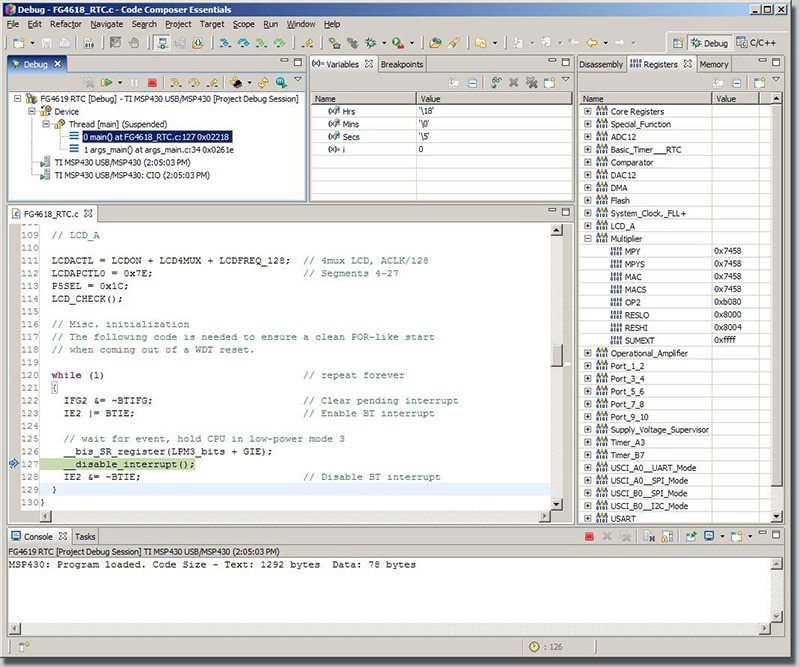
Code Composer Studio
For the more advanced professional users there is a full-featured IDE with several options available for the LaunchPad development kits. Code Composer Studio is an eclipse based IDE that supports all of the TI’s range of embedded processors in its portfolio. The Composer Studio offers the most flexibility and advanced capabilities within the IDE, including a ULP advisor for getting best power consumption out of your projects.

BoosterPacks
Just like Arduino has shields, LaunchPad has BoosterPacks to enhance and expand the capabilities of the MSP430. BoosterPacks are plug-in modules that plug-in to the header pins on the LaunchPad development boards allowing you to explore different applications such as wireless sensing, capacitive touch, LED lighting control and much more.

The BoosterPacks are available in 20-pin and 40-pin variants where 40-pin BoosterPacks allow multiple stacking for rapid prototyping of various BoosterPacks. Not only have TI launched their own family of BoosterPacks but there are a lot more on offer form third-party developers such as SeeedStudio , DFRobot, 43oh.com, Olimex and many more.
SeeedStudio SideKick Kit
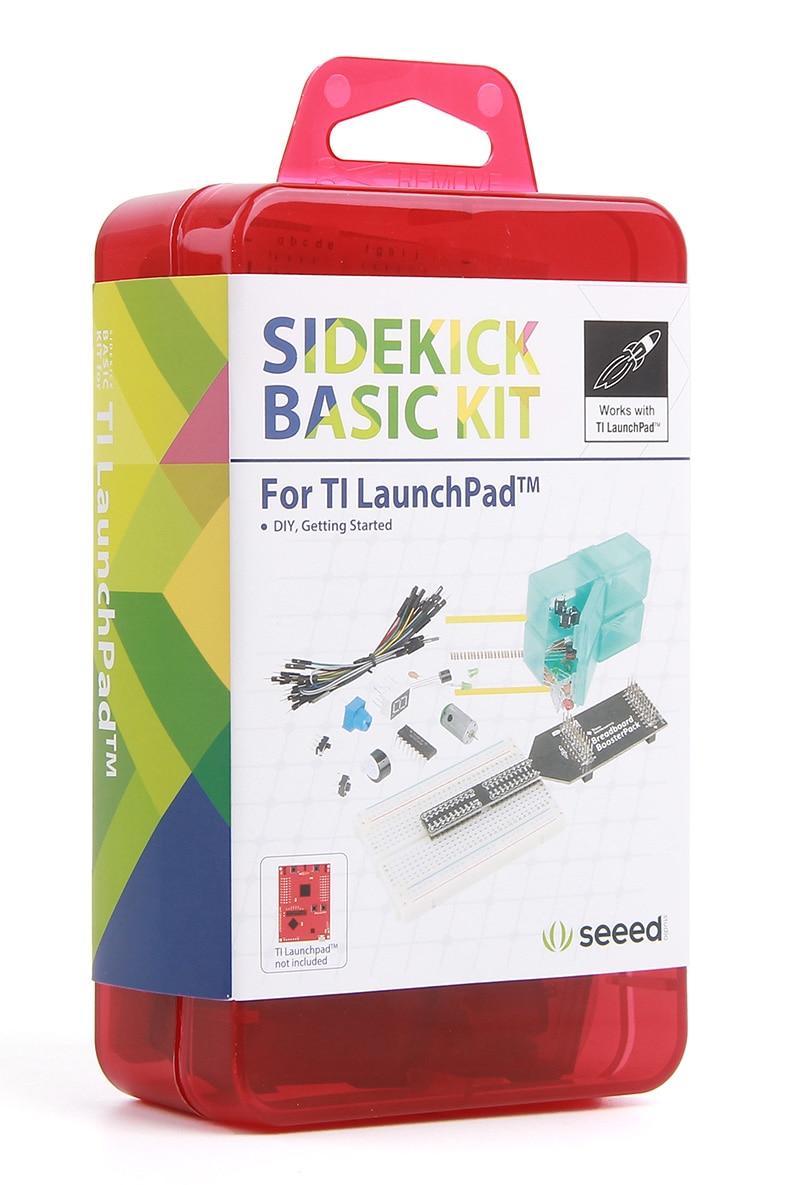
The Sidekick Kit by SeeedStudio is the perfect companion kit for the LaunchPad series. If you just getting started with the MSP430 LaunchPad then this kits comes with all the basic components to complete a variety of projects. The Kit comes with the following parts:
- 1 x Breadboard
- 5 x Green LED
- 5 x Red LED
- 1 x RGB Common Anode LED
- 10 x Ceramic Capacitor 10nF
- 10 x Ceramic Capacitor 100nF
- 5 x Aluminum capacitor 100uF
- 10 x Resistor 330R
- 10 x Resistor 1K
- 10 x Resistor 10K
- 1 x Tilt switch
- 1 x Thermistor
- 1 x Photoresistor (LDR)
- 1 x Diode
- 1 x Buzzer
- 5 x Button
- 5 x Switch
- 2 x Potentiometer with knob
- 5 x Breadboard jumper wire – long
- 20 x Breadboard jumper wire – short
- 1 x 7 segment display
- 1 x Small DC motor
- 1 x TI 8-bit shift register (SN74HC595N)
- 1 x TI Analog Temperature Sensor (LM19CIZ/NOPB)
- 1 x TI NPN transistor (LP395Z/NOPB)
- 1 x TI NPN transistor (PN2222/NOPB)
- 1 x Breadboard BoosterPack Adapter PCB
- 1 x Label for components
- 1 x Sidekick basic for LaunchPad Manual

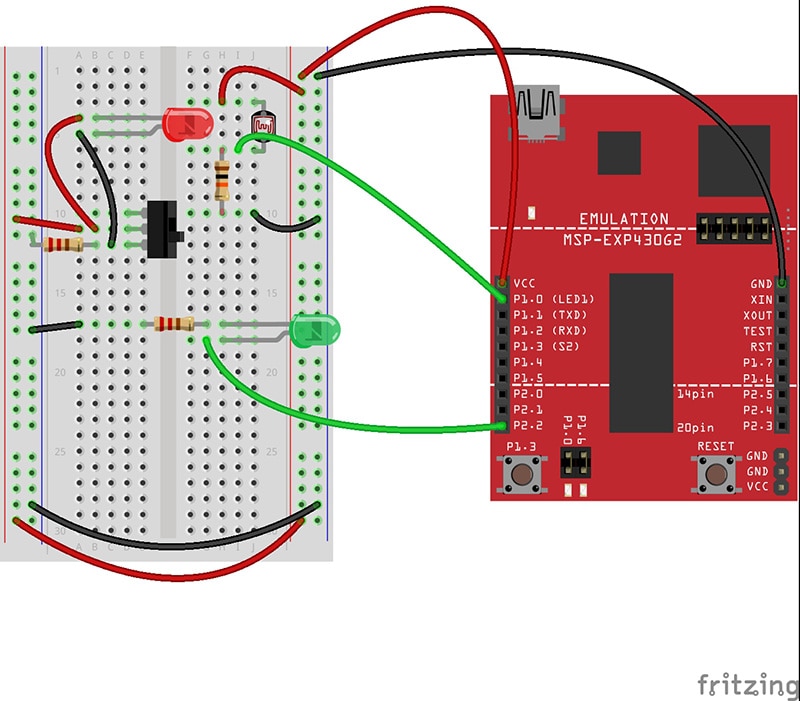
I went ahead and created my own project with the parts in the kit, inspired by another project featured on Maker.io using the MSP430 LaunchPad. I made the tripwire circuit using a red LED and the photo-resistor, whilst the Green LED or buzzer will be the alarm once triggered. I also added a simple slide switch to turn the circuit on or off when required.
Parts Required:
- 1x Red LED
- 1x Green LED or 5V Buzzer
- 1x Photo-resistor
- 1x slide switch
- 2x 330ohm resistors
- 1x 10k resistor
- Male to Male Jumper Wires
- 1x Breadboard

Code:
#define LED1 P2_2
#define sw P1_7

const int sensorPin = A0;
int sensorValue = 0;

void setup() {

  pinMode(LED1, OUTPUT);
  Serial.begin(9600);
}


void loop() {
  sensorValue = analogRead(sensorPin);
  Serial.println(sensorValue);

  if (digitalRead(sw) == LOW){
    Serial.println("LOW");
    while (sensorValue < 500){="" digitalwrite(led1,="" high);="" sensorvalue="analogRead(sensorPin);" }="" digitalwrite(led1,="" low);="" }="" delay(100);="" }="">
When you compile the code above make sure you select the correct board in the boards manager menu, otherwise you will encounter a number of errors as I did. By default, the board selected is msg430g2231 you will need to change this to your board in the list. Also select the serial connection from the port menu, failing to do so will result in compilation error when using ther Serial.println() command.
Run the program and switch the slide switch on to complete the circuit. The red LED will switch on and the LaunchPad will read the value of the LDR. When the value drops t will activate the alarm, in this case the green LED or buzzer.


In the sidekick kit there are 10 example projects using all of the components in the kit, creating some basic circuits for you to understand.
Summary
The MSP430 LaunchPad range is a great low-budget development board to get started with creating your low-powered projects. You can pick up a development kit for around $10 and get started straight away. Furthermore, the LaunchPad range of boards is not only for beginner but for professional use in commercial markets, TI provides advance programming tools through the CCS IDE for more analytical debugging and power analysis. Used in conjunction with the SeeedStudio SideKick kit it is the perfect development tool to get started with embedded systems. If you have any questions regarding the LaunchPad or SideKick Kit then pop them in the comments box below.
Have questions or comments? Continue the conversation on TechForum, DigiKey's online community and technical resource.


