Raspberry Pi Pico and RP2040 - C/C++ Part 1: Blink and VS Code
2021-05-10 | By ShawnHymel
License: Attribution
In previous tutorials, I showed you how to use MicroPython on the Raspberry Pi Pico. While MicroPython is straightforward to use, it has some processing overhead. C offers faster and more efficient computation in the Pico. In this tutorial, I’ll show you how to set up VS Code and blink an LED with C code.
Install Build Tools
At the time of writing, there is no simple, cross-platform IDE that comes pre-loaded with the Pico SDK, so we have to install things manually. I highly recommend reading Chapter 1 (for Linux) or Chapter 9 (macOS and Windows) of the Getting Started with Raspberry Pi Pico guide, as they walk you through the steps needed for installing the various build tools for the RP2040 (and Pico).
The steps below should have you install Visual Studio Code (VS Code). If not, you will need to install it from here.
Linux
If you’re using a Raspberry Pi, Raspbian, or some other form of Debian, this process has been made easy with a simple script that you can run with a few commands:
wget https://raw.githubusercontent.com/raspberrypi/pico-setup/master/pico_setup.sh
chmod  x pico_setup.sh
 ./pico_setup.sh
sudo reboot
macOS
Installing on macOS is also trivial. Make sure you have Homebrew installed, and then run the following commands:
/bin/bash -c "$(curl -fsSL https://raw.githubusercontent.com/Homebrew/install/master/install.sh)"
brew install cmake
brew tap ArmMbed/homebrew-formulae
brew install arm-none-eabi-gcc
Note that if you are on an M1-based Mac, you will need to install Rosetta 2 (the Arm compiler is only available for x86 processors for now). This will likely be fixed in future updates of the Arm GNU Toolchain.
/usr/sbin/softwareupdate --install-rosetta --agree-to-license
Windows
Windows users are left out in the cold (mostly because there are no easy package managers or build systems that come pre-packaged with Windows).
Section 9.2 in the Getting Started guide shows you how to install the build system on Windows. However, I have two issues with the steps outlined there: 1) Build Tools for Visual Studio is 6 GB, and 2) you have to start VS Code from the Developer Command Prompt every time.
If you would like to avoid 1) and 2), I recommend following my guide here to install the build tools using MinGW instead.
Video
I have also provided the steps in this tutorial in video form:
Configure VS Code
In VS Code, I recommend installing a few extensions to make development for the Pico easier. Click the Extensions button on the left side and search for cmake. Install CMake Tools, which will also install the CMake extension.
Click the gear icon under CMake Tools and select Extension Settings.
Scroll down to find Cmake: Build Environment. If you do not have PICO_SDK_PATH set in your environment variables, I recommend adding an item here with PICO_SDK_PATH as the key and the value set to the location of the pico-sdk folder (e.g. C:\VSARM\sdk\pico\pico-sdk).
Scroll down again to find Cmake: Generator. There, enter one of the following values (minus the quotation marks) for your particular build system:
“Unix Makefiles” for Linux and macOS
“NMake Makefiles” for Windows (if you built everything with Build Tools for Visual Studio)
“MinGW Makefiles” for Windows (if you built everything with MinGW)
The Code
In VS Code, select File > Open Folder. Create a folder somewhere on your filesystem, preferably wherever you like to keep your Pico projects (for example, I’ll create a folder named “blink” in “Documents/Raspberry Pi Pico”). Select this new folder and click Select Folder.
Click the New File button next to your folder name in the Explorer pane to create a new file in your project folder. Create two files:
main.c
CMakeLists.txt
In main.c, enter the following code:
#include <stdio.h>
#include "pico/stdlib.h"

int main() {

    const uint led_pin = 25;

    // Initialize LED pin
    gpio_init(led_pin);
    gpio_set_dir(led_pin, GPIO_OUT);

    // Initialize chosen serial port
    stdio_init_all();

    // Loop forever
    while (true) {

        // Blink LED
        printf("Blinking!\r\n");
        gpio_put(led_pin, true);
        sleep_ms(1000);
        gpio_put(led_pin, false);
        sleep_ms(1000);
    }
}
In this example, we are blinking the onboard LED by toggling pin 25. We also print "Blinking!" out over the serial port with printf. We can choose which serial port to use (USB or UART) in the CMakeLists.txt file, as you will see next. You can read more about the various SDK functions in this online documentation as well as in the Pico C/C SDK guide.
A pinout diagram of the Pico can be found in Chapter 1 of the Pico Datasheet.
In CMakeLists.txt, enter the following:
# Set minimum required version of CMake
cmake_minimum_required(VERSION 3.12)

# Include build functions from Pico SDK
include($ENV{PICO_SDK_PATH}/external/pico_sdk_import.cmake)

# Set name of project (as PROJECT_NAME) and C/C   standards
project(blink C CXX ASM)
set(CMAKE_C_STANDARD 11)
set(CMAKE_CXX_STANDARD 17)

# Creates a pico-sdk subdirectory in our project for the libraries
pico_sdk_init()

# Tell CMake where to find the executable source file
add_executable(${PROJECT_NAME}
    main.c
)

# Create map/bin/hex/uf2 files
pico_add_extra_outputs(${PROJECT_NAME})

# Link to pico_stdlib (gpio, time, etc. functions)
target_link_libraries(${PROJECT_NAME}
    pico_stdlib
)

# Enable usb output, disable uart output
pico_enable_stdio_usb(${PROJECT_NAME} 1)
pico_enable_stdio_uart(${PROJECT_NAME} 0)
CMake is a meta-build system that will automatically generate the files necessary for other build systems. We will use CMake to create files for the Make build system and then call “make” to compile and link our code.
Note that the CMake script we created uses some functions found in the pico_sdk_import.cmake file, which is part of the Pico SDK. One reason we set PICO_SDK_PATH as an environment variable is so that this script knows where to find that .cmake file.
Note that the bottom two functions (pico_enable_stdio_usb and pico_enable_stdio_uart) allow us to enable or disable a particular port for printf(). By enabling the USB port and disabling the UART port, we can send and receive serial data over USB.
I recommend checking out this tutorial if you would like to learn more about CMake.
Build
At the bottom of VS Code, you should see a blue status bar. If you installed CMake Tools, it should be populated with extra CMake functionality.
Click No active kit to bring up a drop-down menu at the top of VS Code. Click [Scan for kits]. When this is done, click No active kit again. You should see your installed GNU Toolchain compiler available as an option. Click it (GCC for arm-none-eabi) to set the compiler for your build process.
On the same status bar, click Cmake: [Debug]: Ready, and click Debug in the drop-down menu that appears at the top of VS Code. This should run CMake and create a build directory in your project folder.
The build directory will contain the automatically generated files (from CMake) necessary for building (compiling and linking) your source code. If you want to run CMake again in VS Code, you just need to click the same CMake button again. Note that you can also delete the build directory if you want to start clean.
Click the Build button in the status bar (at the bottom of the window). This will call make to build your project. You should see new, compiled binaries appear in the build folder.
We will use the .uf2 binary to program our Pico. Note that the .elf, .bin, and .hex are also compiled binaries of the same program. The .elf file contains extra debugging information that will allow us to do step-through debugging, which we will explore in the next tutorial.
Upload the Program
The easiest method of uploading your compiled program is to use the UF2 bootloader that comes with the Pico.
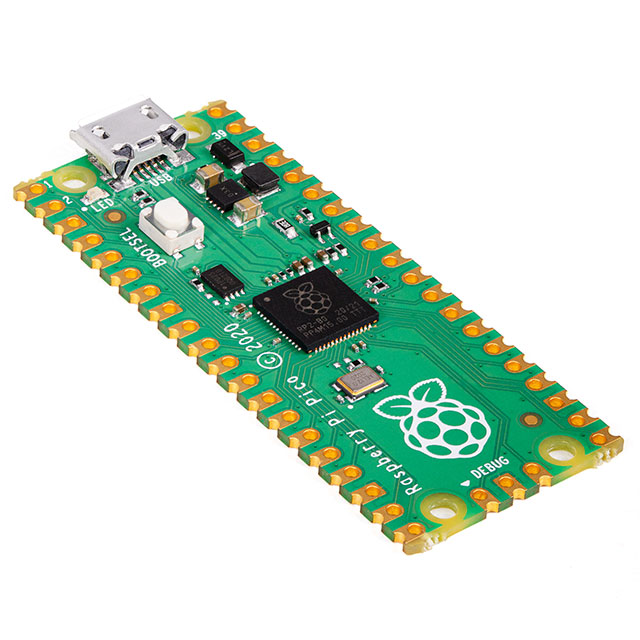
Make sure the USB cable is not plugged into your Pico. Press the BOOTSEL button and hold it down while plugging the USB cable into the Pico. Once the USB cable is attached, release the BOOTSEL button.
The Pico should enumerate as a storage device named RPI-RP2 on your computer.
Navigate into your build folder. Copy blink.uf2 (unfortunately, copying files from within VS Code does not work--you will have to do it from a file explorer window). Paste the file into the top level of your RPI-RP2 drive.
The Pico should automatically reboot and begin running your code. You should see the LED blinking away!
Open a serial terminal program and connect it to the serial port of your Pico (e.g. COM9 in Windows) with a baud rate of 115200. You should see “Blinking!” appear every 2 seconds.
Going Further
I hope this tutorial has helped you get started creating C programs for your Raspberry Pi Pico! If you would like to dive deeper into the Pico C/C SDK, I recommend checking out the following documentation:
Recommended Reading


